Tuesday, August 27, 2013

A Pop of Color & A Little Bling

My next goal in the master bedroom was to liven it up a little and do something to the pocket doors to make them a little more bearable (we had to rip out a bunch of pocket doors, which is NOT a simple project, in our first house because they weren't working well and it left us a little bitter toward them).  After seeing this inspiration picture I decided to use some leftover paint from another project to add a bright pop of color.  

It is Overjoy by Sherwin Williams color matched into Behr high-gloss paint, thankfully it was a good match for the yellow in the curtains tablecloths and throw blanket already in the room.  Here is the bright and lovely after...


And my favorite view from the hallway.


I also brought in our old headboard from IKEA.  I didn't think it would work anymore because in the last house it just looked too "old", but I think it was because of the other colors we were using.  With this new bright color scheme it looks so much better.

Did you spy the other update I made?  It's a small thing, but I changed out the knobs on the nightstand to these fun His & Hers ones from Hobby Lobby.


While I was at Hobby Lobby I also spotted these 3 knobs in our color scheme and brought home a couple of each to try them out with the intention of going back for more of whichever one I liked best.  But to my surprise I was actually digging the look of all of them together (and so did the hubs - shocking!).  Once the room is more finished I worry that it could look a little busy, but for now it brings some fun color to that side of the room.


I am so excited about it's current look and where it's headed, it is so nice to have a master that I love!


    Thursday, August 22, 2013

    A Cozy Master Bedroom

    As promised, the first room to get some love in the new house is the master bedroom.  Now, unfortunately I can't make it into our dream master suite overnight, but I can at least make it feel like a room we want to be in and the major renovations will come as our budget allows (here's hoping for a big tax return next year!).

    For starters here is what the room looked like in the listing and on moving day.

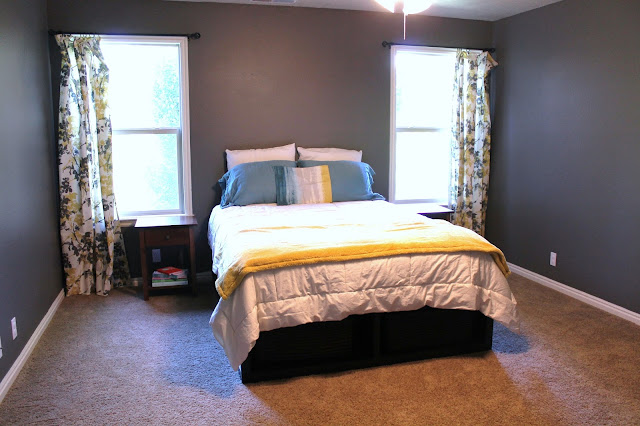
    As you can see we inherited yellow and red walls which were just not our cup of tea.  We knew from our last house that we loved a dark and moody color on the walls of our bedroom.  We decided on a charcoal color, Rugged Suede by Valspar, which will be a nice, neutral backdrop  if  when we choose to change accent colors down the road.  

    A gallon of paint and a couple hours later...


    While I can certainly appreciate a bright and airy room, I am loving how much more cozy and "us" this room is feeling already!

    And here is a list of my plans for this room...
    • Paint walls a dark gray.
    • Do something with the pocket doors, maybe paint a bright color.
    • Wall treatment on the wall behind the bed... board and batten, planks?
    • Install wood blinds.
    • Buy this duvet to add some pattern to the bed.
    • DIY a new headboard.
    • Find a large rug (natural woven, white & fluffy?) for under the bed.
    • Create a seating area at the end of the bed.
    • Install TV on the wall and create a gallery wall to help it blend in.
    • Change out knobs on dresser and nightstands.
    • Find a large mirror to put across from the door to the en suite.
    • DIY art for both long walls.
    • Paint ceiling white (right now it is a dingy looking ivory color).
    • Find bedside lamps, a charging station and other nightstand accessories.
    • Install crown molding.
    • Revamp the ugly ceiling fan.

     There's a lot to be done, but believe it or not this room is already farther along than any of the other master bedroom's we've had.  Hopefully I can tackle a couple things on the list this weekend ;).


    Sunday, August 4, 2013

    Project Zero

    I don't know about you, but sometimes when there is chaos all around me and my to-do list is a mile long I find myself craving a quick project to get me motivated again.  Sooooo, I ignored the pile of boxes in our guest room waiting to be unpacked and decided to give our boring pantry door some life. 


    I have found myself pinning a lot of rooms with brightly painted doors and I also love the functionality of a chalkboard in the kitchen, so I combined the two using a tutorial for DIY chalkboard paint on pinterest.  Thankfully I had all the supplies in the garage so it was quick and free!!! 

    To make my chalkboard paint I used an old sample of Dignity Blue by Sherwin Williams and a box of non-sanded grout.  You just mix 2 tablespoons of grout for each cup of paint you'll be using.  Make sure you mix really well, you don't want any lumps of grout on your final surface.


    Here it is after two coats of paint.


    Next I made sure to condition the surface which is a must do, otherwise whatever you write the first time will never fully erase.  To do this you take a piece of chalk (actually it will take several pieces by the time you are done) and rub the side all over the door. Then use an eraser to work the chalk dust into the paint.


    Now we have an easy place to jot down the things we need to pick up before we close the pantry door and forget all about it.   


    And on the exterior a weekly menu to hopefully avoid all the "What's for dinner" questions (oh, who am I kidding, they'll still ask!).


    I am in love with our new pantry door!  It is the perfect pop of color for our kitchen and once I paint over the brown walls with something a little lighter and neutral it will look even better (if you look closely you can see my paint swatches in the pictures above).  Now I feel ready to take on another project or 20.